Thanks to Cart Boy and Voyager for help with edits and graphics, respectively.
Of the many things Nintendo’s gotten right with the Switch, I’d say the console’s greatest strength is the way it revitalizes the franchises it hosts. From Breath of the Wild’s genre-defining open world to Kirby and the Forgotten Land debuting a new format for the pink puff, fans have been eating good these past few years. Even Pokémon’s breaking its old habits and experimenting with its formula, which is an obvious sign we’re in the middle of a fantastic generation.
Though, while the Switch has been home to countless success stories, that of Xenoblade Chronicles might just be the most impressive. Journeying through the past and present of Xenoblade 2 would’ve been enough, reliving the first Xenoblade only kept the momentum going, but there isn’t a better encapsulation of Monolith Soft’s achievements than Xenoblade 3. We couldn’t have envisioned a better end to this trilogy, a genuine highlight of its year and a compelling introduction to the series for many players. But as expected of us Nintendo fans, all we can think about is how this will affect Smash. Xenoblade’s sure to make a triumphant return to the crossover’s next entry, and on the likely chance it secures a well-deserved newcomer, let’s explore the boundless potential Xenoblade 3 protagonists Noah and Mio could have on the battlefield!
Who Are Noah & Mio?
(Courtesy of Voyager)
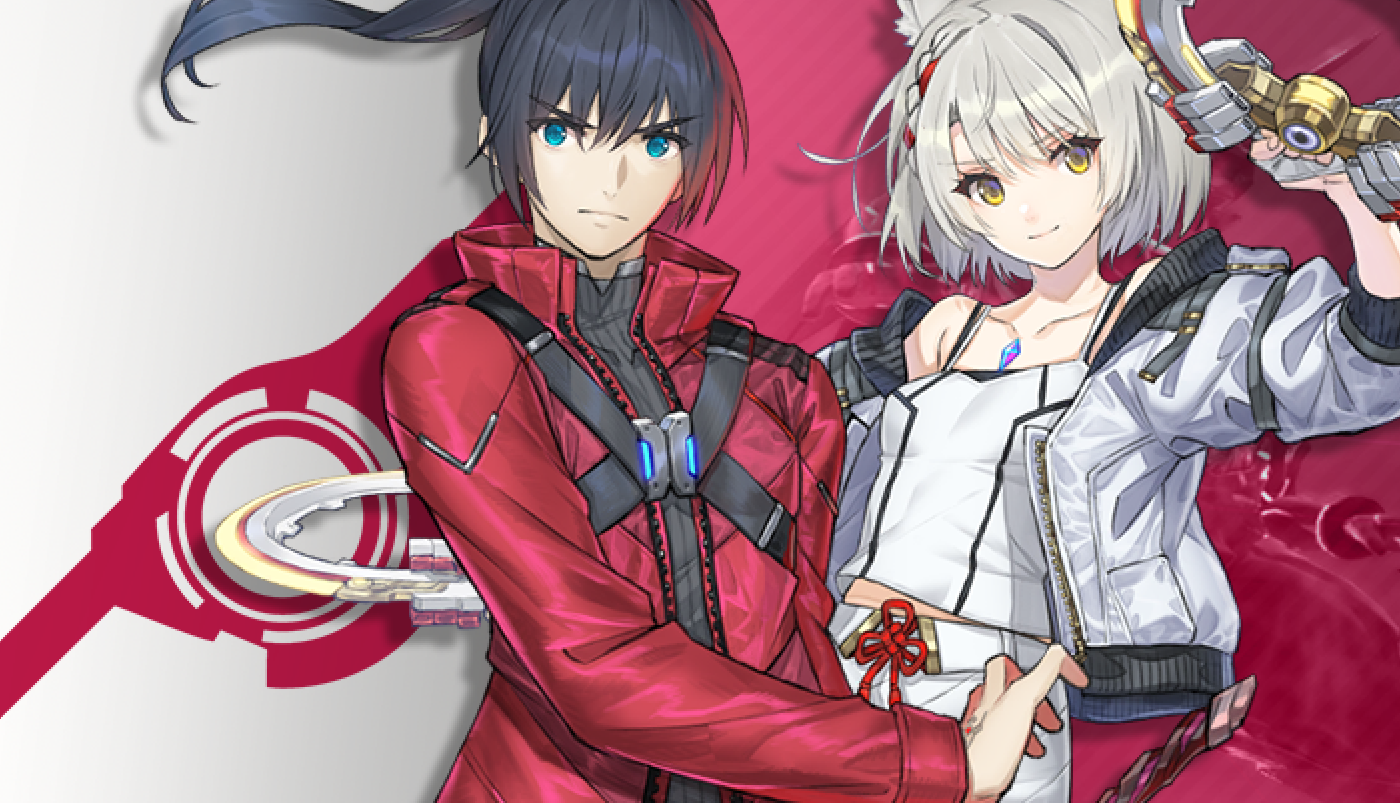
Years after the events of Xenoblade 1 and 2, their previously separated realities have collided. In the new land of Aionios, the forces of Keves (from XC1) and Agnus (from XC2) face each other in a war with no end. This dystopia’s inhabitants are born with only ten years to live, but if they don’t slaughter soldiers from the opposing side and harvest their remaining life force, they’ll have even less time than that. It’s during one of the many, many resulting skirmishes that our band of heroes meet. The empathetic Noah, foul-mouthed Eunie, and protective Lanz call the Kevesi Colony 9 their home, while the reserved Mio, introverted Taion, and affable Sena hail from the Agnian Colony Gamma. Upon encountering a mysterious third party and learning of the masterminds behind this twisted society, the six of them put their differences aside and set off on a journey to free everyone from the oppressive system.
 |
The party is only capable of making this choice due to the power of Ouroboros, granted to them in combat against an enigmatic foe going by “Moebius.” With it, two champions from each nation can “Interlink” to assume a shared, hulking form and turn the tide of battle. Specifically, Noah can unite with Mio, Lanz with Sena, and Eunie with Taion. Though the unlikely allies begin their quest on the run from both Keves and Agnus, they strive to liberate their former comrades from the need to kill and rally everyone against their true enemy: the nations’ Consuls, revealed to be Moebius, as well as the Kevesi and Agnian Queens. Noah and Mio quickly take their places as the squad’s leaders, being the first pair to Interlink and having the biggest roles to play in the story. Moreover, as fellow Off-Seers, soldiers tasked with sending departed souls off via music, their relationship develops into one of the strongest this series has ever seen. The circumstances are dire, as Mio only has three months left before she passes on, but despite it all, they make like every Xenoblade hero that’s preceded them and keep running toward the future.
Importance to Nintendo & Series
 |
Let’s be real, it wouldn’t take one of Shulk’s Visions to expect Xenoblade 3 as a likely candidate for the next Smash game. The crossover’s been very generous to Nintendo’s modern RPGs in the past, and with the other two numbered Xenoblade entries having received fighters, there’s little reason to think the trilogy’s conclusion will be any different. Okay, in all fairness, calling Aionios and its denizens a shoo-in wouldn’t be too accurate. For all we know, our next opportunity to see a new batch of Smash combatants could be years from now. By then, a new generation of characters, both from Xenoblade and Nintendo’s overall catalog, might be relevant. Fortunately, going by previous Smash entries and the material they pulled from, it’s fairly typical for a recent character to join the roster about five years out from their debut. Just look at Shulk, whose only home used to be a Wii game from 2010, yet there he was, headlining Smash’s Wii U and 3DS releases in 2014.
 |
Okay, so we can all agree that a newcomer from Xenoblade 3 is plausible, but who should it be? Well, it’s obviously a deadlock between the original Ouroboros partners, Noah and Mio. The former’s your traditional JRPG protagonist, peculiar sword and all. Though, let’s not discredit the Kevesi Off-Seer, as he’s an exceptional character with an atypical weapon that could bring a lot of fun to Smash. On the other hand, Mio’s clearly the breakout star of her game. On top of already having some exclusive merchandise in the pipeline, this Off-Seer from Agnus wields an interesting pair of twin rings, unfamiliar armaments that give her points for creativity. Smash fans like seeing brand-new weapon types added to the pile, so that’s definitely a feather in the heroine’s cap. Personally, I think this decision could go either way. Mio’s popularity is undeniable, but Smash has shown some reverence for the iconography of the Monado and Aegis. Maybe that’ll inspire the developers to pick Noah, since he’d bring the third famous sword, Lucky Seven, along with him? However, to shortchange an amazing nominee like Mio would be very disappointing, so who knows?
For this concept, we’ll simply ignore the impossible choice and make them a two-in-one. Considering how the pair’s full strength is only achievable when working in sync, they’re the stars of the first Xenoblade game to allow control of multiple characters mid-combat (aside from Torna), and the franchise’s latest reps, Pyra and Mythra, were also a package deal, this is looking like the most enticing course of action. Speaking of package deals, since this article’s debut, Noah and Mio have earned themselves some amiibo and even a Spirit in Ultimate itself. They’re joined at the hip, and whether or not that would translate to a shared spot on the roster, there’s merit in discussing them as two halves of one whole.
Colors & Design
Although it’s always been a divisive topic, Xenoblade’s character designs are phenomenal. Previously, you’d need to look no further than Dunban or Mòrag to realize that, but the soldiers of Aionios reach similar heights. Inspired by the sci-fi aesthetic of Keves and the feudal-Japanese look of Agnus, respectively, Noah’s and Mio’s fits are equal parts memorable and functional. And their jackets deserve a special mention, looking especially slick and representing the duo’s Swordfighter and Zephyr classes. In Smash, these designs wouldn’t need any changes, as they’d fit in perfectly after a transition to its unifying style. This extends to their Ouroboros forms, which they could call upon for their Final Smashes.
Before we talk colors, here are some details that’d make Noah and Mio feel even more accurate: the Agnian’s feline ears could be as emotive as usual, the Ouroboros symbol should occasionally appear from within their Irises (like with Lucina’s Brand of the Exalt), and their Blades, Mio’s Core Crystal, and Noah’s Power Frame could all glow to varying degrees. Oh, and shoutout to Noah’s English voice actor, Harry McEntire, and Mio’s, Aimee-Ffion Edwards. Their contributions to Xenoblade 3 were fantastic, and we can only hope they’d reprise these roles in Smash.
 |
As for their palette swaps, Mio’s would feature a split between her short and long hairstyles, with the former going to her first four colors and the latter to the rest of them. After the pair’s default costume, their second features green for Noah and light blue for Mio (referencing the Bionis and Cloud Sea), their third is white for Noah and yellow for Mio (resembling Melia and Nia), their fourth sees them donning their military uniforms for a full-on alternate costume, their fifth (the first of Mio’s long-haired lineup) is blue for Noah and black for Mio (as seen in XC3’s Expansion Pass), their sixth is gold for Noah and a blend of silver and red for Mio (alluding to Consuls N and M), their seventh is light blue for Noah and orange for Mio (like with their Swimwear B sets), and their eighth is purple for Noah and pink for Mio (referencing Z and Alrest’s Saffronia Trees).
(Courtesy of @_TheyWhoRemain_)
(Courtesy of Voyager)
How Would They Play?
Noah’s stats and properties:
- Weight: ∼ Roy (95)
- Height: ∼ Shulk
- Overall Speed: ∼ Young Link
- Walk Speed: 1.247
- Run Speed: 1.936
- Air Speed: 1.155
- Jump Height: ∼ Duck Hunt (34)
- Multi-jumping? No
- Crawling? No
- Wall jumping? No
Mio’s stats and properties:
- Weight: ∼ Zero Suit Samus (80)
- Height: ∼ Sheik
- Overall Speed: ∼ Palutena
- Walk Speed: 1.42
- Run Speed: 2.31
- Air Speed: 1.22
- Jump Height: ∼ Sonic (35)
- Multi-jumping? No
- Crawling? No
- Wall jumping? Yes
(A closer look at the stats)
 |
Admittedly, we’re gonna want to distinguish Noah from Shulk wherever we can, so let’s start with their swordplay. Although our Visionary relies on the Monado to do the heavy lifting, swinging it around with less finesse than most weapon users, Noah operates a lot like fellow troopers Cloud and Chrom. He’s decently swift and disciplined, his massive Veiled Sword launches targets with ease, but his recovery and aptitude for racking up damage are middling. Rather, the next-generation Homs is all about making hard reads and ending stocks early, which are where his Blade shines. In truth, the Veiled Sword’s just a sheath for the aforementioned Lucky Seven, a mysterious katana that Noah reluctantly unleashes for his strongest attacks. The weapon’s strikes are fast and powerful, but whiffing them invites punishment. Thus, until an opportunity presents itself, Noah relies on the Veiled Sword’s impressive reach to play a game of footsies. Now, we’d best not forget that he’s only one half of a greater playstyle, so his weaknesses are especially pronounced. Commit too hard, fail to maintain your distance, or find yourself in a tough situation offstage, and Noah might just be the one whose soul needs a sendoff.
 |
Thankfully, Mio’s always around to make up for her musical malewife’s shortcomings. In Xenoblade 3, her Zephyr class serves as an evasion tank, built to draw the enemy’s attention and reliably avoid attacks. To that end, she brawls with a grace and poise that resemble those of Sheik. Her moveset is deceptive and great for starting combos, she has no trouble returning to the stage, but her lighter weight and inability to reliably take stocks can make things difficult in the late game. While the Gormotti’s lethality leaves a lot to be desired, don’t underestimate what she can do with her Dual Moonblades. Not only can they offer her attacks a fair bit of disjoint, but they’ll also put work in as obnoxious projectiles. All in all, Mio’s a textbook hit-and-run fighter. She’s perfect for weaving in and out of foes’ range, constantly chipping away at them and interrupting their moves, yet her efforts are likely to only bear fruit if Noah can come in and finish the job.
 |
To switch between Noah and Mio, you’re probably expecting their down specials to be involved. But for this pair of Off-Seers, that’s not the full story. By holding any of their specials down, all of which are inspired by some of Xenoblade 3’s Arts, you’ll perform a powered-up Fusion Art—with properties of both Noah’s Art and Mio’s. For instance, by executing a held version of Noah’s neutral special, Sword Strike, a stronger take on the move—featuring elements of Mio’s Butterfly Blade—is unleashed. If this empowered special hits a foe (or their shield), Mio instantly appears in Noah’s place. Conversely, Mio can perform a Fusion Art of her own to let Noah take the lead. With this system in place, switching between movesets takes much more effort than a simple button press, but in exchange, you’ve got some exceptional specials at your disposal. To distinguish all the default specials from the Fusion Arts, we’ll give Noah’s defaults blue particles and his Fusion Arts yellow particles, while Mio’s defaults get yellow and her Fusion Arts blue. Anyway, like it or not, your strengths and weaknesses can shift on a dime with these two. By working within their limits and relying on some solid fundamentals, this power couple is sure to help you overwhelm your opponents and seize the future.
Boxing Ring Title: “End of the Endless Now”
Noah’s Moveset
| Move Type |
Description |
| On-Screen Appearance
|
As Noah appears from a few rings of ether energy, he summons his Veiled Sword. Like with the Aegis or Pokémon Trainer, players can choose to lead with either Noah or Mio from the character select screen. |
| Stance
|
Noah grasps his Blade in both hands, bends his knees, and maintains a stoic stance that resembles Cloud’s. |
| Idle #1
|
Noah straightens up, closes his eyes, and holds his sword closer to his face. |
| Idle #2
|
Noah holds two fingers to the side of his head, causing the Ouroboros symbol to appear from within his right eye. |
| Walk
|
Noah cautiously marches ahead, grasping the Veiled Sword in one hand and keeping its tip lowered. |
| Dash & Run
|
Noah, with one hand on his Blade, holds it to one side and charges forward at a moderate pace. |
| Crouch
|
Noah takes a knee, rests one hand on the ground, and uses his other hand to keep the sword in front of his upper body. |
| Jump
|
With only one hand grasping his sword, Noah leaps upward. And for his double jump, he performs an average frontflip or backflip. |
| Damage
|
Noah gives a pained expression as one of his hands releases the Veiled Sword. |
| Shield
|
Noah lifts his arms up and guards himself with his Blade, pointing it downward. |
| Dodge
|
Noah skillfully sidesteps in place for his spot dodge, and can swerve forward and backward for his rolls. |
| Floor & Edge Attacks
|
Having landed on his back, Noah stands back up with a kick to one direction and a sword swing to the other. And upon climbing from a ledge, he stabs his Blade along the floor. |
| Neutral Attack:
Kevesi Cleave
|
Noah swings his Blade from left to right, then right to left, then finishes this three-hit combo with a downward slice. The technique’s power and speed are lacking, but its reach is outstanding. |
| Forward Tilt:
Steel-Plated Slam

|
As one of Noah’s hands lets go of the Veiled Sword, the scabbard’s metal flies toward his free arm (revealing Lucky Seven) and forms a flashy gauntlet around it. Then, Noah quickly punches ahead with the armored hand, repelling anything in his way. This move’s immediacy makes up for the neutral attack’s inability to relieve pressure. |
| Up Tilt:
Brave Brandish
|
Noah dramatically thrusts the Veiled Sword upward, then reels it backward to cover an even wider radius. Although this maneuver’s on the slower side, it excels at keeping airborne aggressors at bay. |
| Down Tilt:
Tactical Topple
|
Noah stabs the Veiled Sword along the floor, then forcefully withdraws it to unleash another hitbox. Fighters struck by either of these flourishes are launched at a horizontal angle, but the attack’s sluggishness makes it especially risky. |
| Dash Attack:
One Second
|
Noah interrupts his dash by carrying his momentum into a small jump, unsheathing Lucky Seven, and bringing both it and himself back down with a resounding stab. This move’s range and cooldown are surpassed by those of the Veiled Sword, but foes ought to respect it and take care when they’re landing near Noah. |
| Forward Smash:
Infinity Blade
|
With one arm, Noah holds the Veiled Sword near his hip, then grabs its hilt with his other arm. An instant after the input is released, the Off-Seer draws Lucky Seven and slashes it at the area to his front, launching victims a considerable distance forward. Think Meta Knight’s forward smash, but stronger and slower. |
| Up Smash:
Shooting Shard
|
With Lucky Seven in hand, Noah points the weapon skyward and swings it from the background toward the foreground. As expected of Lucky’s moves, it comes out immediately and can kill off the top, but it’s narrow and easy to punish. |
| Down Smash:
Tachyon Slash
|
Noah holds his sword toward his waist and his hand on its hilt, but distinguishes this pose from his forward smash’s with a wider stance and a distortion effect that surrounds his body. Then, with the input’s release, Noah draws Lucky Seven and returns it to its scabbard so quickly that bursts of slashes appear in front of and behind himself. This technique’s not that devastating, but it keeps fighters away with a wide radius and windbox. |
| Neutral Aerial:
Sword & Scabbard
|
Grabbing Lucky Seven’s hilt with one hand, then the tip of its sheath with the other, Noah spins horizontally to strike both sides with either of his sharp objects. He covers a lot of space in a short amount of time, but the move’s unwieldy nature makes it one of his weakest. |
| Forward Aerial:
Ferronis Wrecker
|
Noah performs what is, more or less, an airborne take on his forward smash. After a good bit of startup, he unsheathes Lucky Seven, slashes it forward, and launches anyone in its path. This attack’s a lot like Greninja’s forward aerial, but with Lucky’s usual strengths and weaknesses. |
| Back Aerial:
Phantom Slash
|
Noah turns around and swings the Veiled Sword from low to high, covering a good bit of space with his strike. Although it takes unexpectedly long to conclude, the motion trails it leaves behind feature a weak hitbox, which can help Noah in his efforts to stay at his preferred range. |
| Up Aerial:
Bounding End
|
Noah slashes the Veiled Sword skyward to poke at anything above himself, stalling his descent the first time he does so. Primarily, this attack serves to keep airborne foes at bay and mix his landings up. |
| Down Aerial:
The Only Way
|
Noah unleashes Lucky Seven, points it straight downward, then rapidly descends. As expected of a stall-then-fall, foes on the receiving end of Lucky’s tip are violently spiked, but Noah’s mediocre recovery might seal his fate if he goes for this attack offstage. |
| Grab:
Swordless Seize
|
Noah releases the Veiled Sword with one of his arms, then attempts to grab anything in front of himself. Like with Marth, another fan of mid-range interactions, Noah’s grappling is mediocre. |
| Pummel:
Noble Knee
|
With his hands preoccupied, Noah simply knees his foe to inflict some damage. Unfortunately, as far as pummels go, it’s on the slower side. |
| Forward Throw:
Edge Thrust
|
Noah releases his enemy, then stabs the Veiled Sword directly through them. He’s unlikely to kill anyone with this throw, but the horizontal angle victims are launched into can prepare some favorable situations. |
| Back Throw:
Covert Attack
|
Noah rolls to his opponent’s other side, then swings his Blade at them. Near the edge of the stage, this can be Noah’s most dangerous throw. |
| Up Throw:
Air Slash
|
Relying on the same technique that inspired Shulk’s up special, Noah strikes the foe with a rising uppercut from his sword. The soldier doesn’t go nearly as high as his predecessor does, but getting to follow a victim as they’re being launched can lead to some interesting follow-ups. |
| Down Throw:
Ground Beat
|
Noah lifts the Veiled Sword, then dramatically brings it down on his prisoner. As both the sword and foe hit the floor, the throw’s respectable kill power is conveyed by the rocks and rubble that appear from underfoot. |
| Neutral Special:
Sword Strike
|
Noah braces himself, then performs a turnaround slash with his Veiled Sword. Aside from its threatening reach, what distinguishes this maneuver is its sweet spot at the tip, which forces foes to fall in place (like with Ridley’s Skewer). Although the perfect hit’s hard to land, what with the move being somewhat slow, doing so leaves victims wide open. Specifically, the higher the enemy’s damage, the longer they crumple. However, by holding the input to borrow traits from Mio’s Butterfly Blade, Noah evades attacks as he swings his weapon (but still takes a bit of pain from them, resembling Mythra’s Foresight) and gains a more generous sweet spot. Of course, like with every Fusion Art, landing this empowered move makes Noah automatically switch places with Mio. |
| Side Special:
Overclock Buster
|
Noah leaps forward, flips in midair to prepare the Veiled Sword, then falls with increasing speed as the Blade cleaves anything in its wake. Of all the attacks in his arsenal, this one takes the most inspiration from Shulk. Based on Back Slash, Noah can use the jump to avoid projectiles or aid in horizontal recovery, and the sword’s swing to make way for his landing. But instead of dealing extra damage from behind, this technique can spike foes and is moderately powerful from all directions. Fusing this special with Mio’s Wide Slash, fortunately, provides it with more horizontal movement (and, if it connects, a switch to Mio upon reaching the ground), which can save Noah’s life offstage. |
| Up Special:
Harmonic Wave
|
Noah draws Lucky Seven and, as ether particles engulf the katana, spirals directly upward. Throughout his ascent, he holds Lucky in front of himself to trap nearby enemies and bring them along. Finally, at the apex of his recovery, Noah slashes the sword at a downward, diagonal angle to spike anyone caught in his attack. Although Noah’s up special can be dangerous, its lack of range or speed makes it one of his most exploitable weaknesses. Pairing it with Mio’s Air Fang allows Noah to fly slightly farther, but unless he grabs a ledge, his diagonal slash will cause him to swiftly plummet (only switching to Mio if he manages to both hit someone and land). |
| Down Special:
Night Breaker
|
After a bit of startup, Noah unsheathes Lucky Seven and points it downward to release a wave of ether on all sides. Around its outer radius, the wave merely disperses enemies with a weak hit and windbox, but if targets are especially close to Noah when it reaches them, they’re repelled with greater force and dealt a temporary nerf to their damage output. As for the Fusion Art, when combined with Mio’s Speed Demon, Noah’s initial startup becomes a counterattack, allowing him to launch foes with a slash from Lucky if it’s successful (which still inflicts the debuff, but the counter’s strength doesn’t depend on whatever it parried). And like with Sephiroth’s Scintilla, if no one falls for it, the usual wave is still unleashed, but it’s even weaker than that of the original special (if an opponent or shield is hit by either part of this Fusion Art, Mio tags in). |
| Final Smash:
Origin Blade
|
As Mio appears beside Noah, they raise their hands in unison and Interlink to transform into Noah’s Ouroboros form. To begin his assault, the imposing Swordfighter performs the Dragon Tail Art, crouching as the whip-like appendage on his head swings in a horizontal circle to capture nearby targets. Imprisoned foes are knocked toward Noah’s front, after which he begins pulling something out of the core in his chest. As he does so, beams of light emit from said core, devastating his enemies. Finally, Noah fully withdraws a massive, Monado-like greatsword, then dramatically swings it downward. The fighters cleaved by the Sword of the End are then launched relatively far as the Off-Seers revert to normal, but if they leave the Final Smash with at least 100% damage, they’re killed instantly. |
| Up Taunt:
Peerless Riku
|
Riku appears from behind Noah (who looks a bit surprised to see his friend and mentor), grabs a piece of machinery off the ground, and proudly proclaims, “Riku find rare doodad right here!” |
| Side Taunt:
A Life Sent On
|
Noah pulls his flute out and uses it to play the Kevesi Off-Seeing tune. However, if the palette swap he’s sporting is one of the latter four choices, all of which are paired with a long-haired Mio, then he’ll instead use Mio’s flute to play the Agnian tune. |
| Down Taunt:
Ouroboros Order
|
Noah unsheathes Lucky Seven, points it forward, and says, “This is our path to the future!” As he does so, a silhouette of his Ouroboros form appears from behind, then disappears. |
| Victory Pose #1
|
As the camera focuses on Lucky Seven’s hilt, Noah draws the katana, slashes at the air with it, then holds it in front of himself. Throughout this victory pose, he states, “Embers on coat… Brush them off.” |
| Victory Pose #2
|
Noah and Mio notice an immediate threat, then turn to each other and join hands. Suddenly, they Interlink and assume Noah’s Ouroboros form, dwarfing the camera and preparing for battle. |
| Victory Pose #3
|
The camera slowly approaches Noah and Mio as they stand next to each other and play their flutes in unison. Specifically, they play their nations’ Off-Seeing tunes as blue motes move skyward from all sides. |
| Victory Fanfare
|
Without a doubt, Noah and Mio’s fanfare could only be a short remix of “Carrying the Weight of Life.” This theme encapsulates much of what makes their game so special, even being performed by The Game Awards Orchestra during 2022’s livestream. Uniquely, the Off-Seers’ first and second victory poses feature a remix of the song’s climax, but their third victory poses use its “A Life Sent On” portion. |
Mio’s Moveset
| Move Type |
Description |
| On-Screen Appearance
|
As Mio appears from a few rings of ether energy, she summons her Dual Moonblades. Like with the Aegis or Pokémon Trainer, players can choose to lead with either Mio or Noah from the character select screen. |
| Stance
|
Mio leans forward, holds a Blade in each of her hands, and rhythmically shifts back and forth. |
| Idle #1
|
Mio lifts one of her twin rings to the front of her face, then inspects it as her ears perk up. |
| Idle #2
|
Mio pulls out her diary and a pencil, uses them to write a few unseen words, then puts them away. |
| Walk
|
Mio holds one ring in front of herself and advances at an impressive pace, easily outspeeding most walks in the game. |
| Dash & Run
|
Mio briskly sprints ahead, her arms and Blades to her back, with a speed and flair that resemble Fox’s dash. |
| Crouch
|
As one of Mio’s weapons disappears, she lowers her head, widens her legs, and rests one hand on the floor, evoking a pose her Ouroboros form strikes. |
| Jump
|
Mio leaps into the air, her arms and twin rings raised above her head, and performs flashy somersaults for her double jump. |
| Damage
|
Mio grits her teeth and stumbles backward, then regains her composure. |
| Shield
|
Mio protects herself by bringing her weapons together, forming a cross-like shape with them to deflect incoming attacks. |
| Dodge
|
For her spot dodge, Mio quickly ducks forward or backward. And for her rolls, she turns around and gracefully steps toward the inputted direction. |
| Floor & Edge Attacks
|
Having landed on her side, Mio gets back on her feet with a nimble spin that’s protected on both sides by her Blades. And upon emerging from a ledge, she does a handstand, then kicks her feet along the floor. |
| Neutral Attack:
Agnian Assault
|
Mio performs a turnaround kick, puts one knee on the ground (while facing the opposite direction), stabs behind herself with both Blades, then turns back around to swing her weapons once more. Conversely, Mio could keep the barrage going with a rapid jab, relentlessly slashing at anything in front of her. |
| Forward Tilt:
Disc Dispatch
|
Mio instantly hurls one of her twin rings forward, which goes decently far before returning to its owner. The flying Blade’s speed and range are fantastic, but since it can’t make foes flinch, it primarily serves as a means to provoke them. |
| Up Tilt:
Counter-Clock
|
Mio performs a roundhouse kick with one of her legs, raising it above her head and knocking nearby enemies into the air. Like with Sheik’s forward tilt, victims of this attack are likely to be left wide open. |
| Down Tilt:
Feline Feint
|
Mio hops backward, possibly out of opponents’ range, and tosses one of her rings at the floor she was standing on. On top of acting as an additional evasive tool, anyone hit by this projectile is launched upward, primed for more punishment. |
| Dash Attack:
Deadly Twister
|
Mio interrupts her dash by slashing downward, landing on the floor, and getting back up by performing a horizontal spin with her Blades out. Anyone in her vicinity is drawn into the whirlwind, where they suffer a few hits before being launched directly skyward. |
| Forward Smash:
Gemini Strike
|
As Mio stretches her arms above and behind her back, the Dual Moonblades rotate around them with increasing speed. Upon the input’s release, she throws one of her rings forward, which goes a short distance, then throws the other, which travels slightly farther. These projectiles work like Greninja’s fully-charged Water Shuriken, featuring multi-hits and a launching finisher, but are weaker and return to their wielder when they’ve gone far enough. |
| Up Smash:
Soaring Sundancer
|
After a brief startup period, Mio corkscrews off the floor (jumping surprisingly high) and performs a rising uppercut with one of her rings. With this technique’s fluid movement and disjointed hitbox, enemies might just whiff their own attacks and find themselves on the receiving end of Mio’s. |
| Down Smash:
Dominion Flower
|
Mio braces herself by holding her Blades in front of herself, then releases them as they encircle her for a few moments. As the weapons do so, they can strike targets multiple times and trap them briefly, then conclude by launching victims toward the heavens (soundtrack-related pun intended). |
| Neutral Aerial:
Radiant Ring
|
Mio elegantly frontflips a few times in midair, extending a foot in one direction and one of her twin rings in the other, to repel nearby foes. Like with some of Mio’s other moves, her shifting hurtbox and decent range can help her evade enemies’ strikes and even punish them for the attempt. |
| Forward Aerial:
Jaguar Slash
|
Mio raises a Blade above her head, then quickly swings it downward. Those in the armament’s path take some damage, but more importantly, are left vulnerable to one of the Off-Seer’s many follow-ups. Sure, this technique isn’t very flashy or interesting, but there’s nothing wrong with a reliable aerial. |
| Back Aerial:
Blinding Eclipse
|
Mio looks backward and thrusts one of her twin rings toward the same direction, somewhat like Lucina’s back aerial. As expected of such a swift and narrow attack, it’s one of the best options Mio has when it comes to securing knockouts. |
| Up Aerial:
Glow Ring
|
Mio lobs one of her Blades directly upward, which stops a short distance above its wielder and spins vertically for a moment, then returns to her. While the ring’s active, following the Off-Seer as she drifts through the air, it traps prey with a series of hitboxes, then finishes by launching them. However, much like Joker’s or Greninja’s up aerials, victims can be dragged down and left defenseless. |
| Down Aerial:
Full Moon Drop
|
Mio faces the foreground, readies her leg, then kicks it in a downward, semicircular arc. Resembling Palutena’s down aerial, those struck by the hitbox’s lowest point are spiked. Given Mio’s overall lack of kill power, a precise hit from this technique can be invaluable. |
| Grab:
Gamma Grapple
|
As one of Mio’s twin rings disappears, she uses her free hand to seize anything in front of herself. Her grab’s speed and range exceed those of Noah’s, which encourages her to rely on it more and stay near her foes. |
| Pummel:
Omega Onslaught
|
Mio uses her free hand and Blade to slash at her prey, inflicting moderate damage at an impressive rate. |
| Forward Throw:
Stormy Gale
|
Mio stabs her opponent with her remaining ring to hold them in place, summons her other ring, and swings it to launch them forward. Against especially damaged foes, this throw has a decent chance at killing them. |
| Back Throw:
Biting Back
|
Mio seamlessly dashes to the other side of her victim, then slashes at them with both rings to launch them at an upward angle. As far as back throws go, this one’s ability to start combos is excellent. |
| Up Throw:
Shining Halo
|
Mio sends her prisoner skyward with a backflip kick, then tosses a Blade their way to make them rise higher. This throw ends stocks more reliably than her forward throw does, but its power isn’t too impressive. |
| Down Throw:
Pivotal Pounce
|
Mio trips her foe with one foot, then takes advantage of their fall by jumping with her rings raised and bringing them down on her opponent. Much like Mythra’s down throw, this throw’s all about starting combos. |
| Neutral Special:
Butterfly Blade
|
Mio forcefully swings one of her Dual Moonblades from low to high (evading any attacks that come her way, but like with Mythra’s Foresight, still taking a bit of recoil from them), and if she traps a foe with a successful hit, continues her onslaught by advancing with a spin and slashing once with each ring. The third and final attack is the most powerful, launching fighters and even killing those already on death’s door. However, by holding the input to borrow traits from Noah’s Sword Strike, the third slash makes victims fall in place, with how long they’re immobilized depending on how hurt they are. Since Mio uses this chance to switch with Noah, especially battered victims are sure to be at Lucky Seven’s mercy. |
| Side Special:
Wide Slash
|
Mio pounces ahead, quickly moving a considerable distance, then slashes her twin rings from high to low upon reaching her destination. The maneuver deals negligible damage during the dash and only slightly more knockback if the finishing slices connect, but on top of making horizontal recovery much easier, it supplies Mio with intangibility throughout her lunge. Moreover, by combining this special with Noah’s Overclock Buster, the slashes gain additional power and the ability to spike. Basically, the Fusion Art’s like Sheik’s Bouncing Fish, but with Wolf Flash’s iconic sweet spot. By the way, switching to Noah is made easier with this move’s wide hitbox, but that also makes it risky offstage. |
| Up Special:
Air Fang
|
As trails of ether emit from Mio’s Blades, she corkscrews toward any direction, as inputted by the player. For an up special, she reaches her destination incredibly quickly, speeding past fighters and shields with a weak hitbox. But at her farthest point, if she doesn’t collide with the ground or grab a ledge beforehand, Mio swiftly dives downward and swings her Blades in the same direction, almost definitely ending both her stock and those of everyone in her way if she’s offstage. Fusing this special with Noah’s Harmonic Wave both slows the first flight down (allowing for some unpredictable recoveries) and modifies its hitbox, making it so that foes struck by it are knocked toward Mio’s endpoint and, as a result, at risk of being spiked (of course, Noah only takes over if Mio manages to both hit someone and lands). |
| Down Special:
Speed Demon
|
This fairly standard counterattack sees Mio assuming a defensive posture by bracing herself, then covering her face with one of her Blades. If she’s struck by an attack during this narrow window, she darts toward her prey with blinding speed, briefly vanishing from sight, then reappears from behind her foe and dashes through them with a powerful slash from her weapons. The direction she launches fighters into can be influenced by the player, said launch’s power is fixed, and like with Sora’s Counterattack, her counter can also be used to sidestep projectiles and allow them to continue their trajectory. Pairing this attack with Noah’s Night Breaker doesn’t change all that much, giving it the ability to inflict foes with a brief nerf to their launch resistance, but since a successful Fusion Art signals Noah’s arrival, debuffed foes are more vulnerable to being sent off by Lucky Seven than ever. |
| Final Smash:
Resonant Edge
|
As Noah appears beside Mio, they raise their hands in unison and Interlink to assume Mio’s Ouroboros form. The formidable Zephyr begins by performing the Dual Fang Art, summoning two rings of light from her elbows, then firing them in front of and behind herself to trap nearby foes. As caught opponents are knocked toward Mio’s front, she creates a massive dome of glowing rings around them, all of which unleash beams of light and duplicates of Mio’s empowered form that converge on the victims. Finally, Mio leaps skyward, readies a ring of light in her hand, falls back down, and swings at her quarry with the weapon. As the Off-Seers cancel the Interlink, their prisoners are launched decently far, but the Final Smash’s damage output is what’s most impressive. |
| Up Taunt:
Peerless Manana
|
Manana appears from behind Mio (who responds to her culinary friend’s arrival by uttering, “Huh?”), grabs an unspecified ingredient off the ground, and playfully says, “Manana want something a bit meatier!” |
| Side Taunt:
A Life Sent On
|
Mio pulls her flute out and uses it to play the Agnian Off-Seeing tune. However, if the palette swap she’s sporting is one of the latter four choices, all of which feature long hair, then she’ll instead use Noah’s flute to play the Kevesi tune. |
| Down Taunt:
Ouroboros Order
|
Mio performs a few practice swings with her twin rings, glares forward, then states, “Your fate was sealed when you rose against us!” As she does so, a silhouette of her Ouroboros form appears from behind, then disappears. |
| Victory Pose #1
|
Mio tosses her Dual Moonblades upward, leaps into the air to catch them, then lands with her back to the camera. Throughout this victory pose, she simply says, “It’s been fun.” |
| Victory Pose #2
|
Mio and Noah notice an immediate threat, then turn to each other and join hands. Suddenly, they Interlink and transform into Mio’s Ouroboros form, twirling along the ground and preparing for battle. |
| Victory Pose #3
|
The camera slowly approaches Mio and Noah as they stand next to each other and play their flutes in unison. Specifically, they play their nations’ Off-Seeing tunes as blue motes move skyward from all sides. |
Closing Thoughts
Although Xenoblade 3 isn’t my favorite in the series, it comes close! So many standout games made their marks on the Switch, but it’s amazing how this one does everything well. The story and world of Aionios, the battles that take place within, the stellar music that backs it all, and especially its residents are all fantastic; it’s exciting to think this could all be repped in Smash someday. I knew a “Dream Smasher” was in order, but deciding on how I’d handle it wasn’t so simple. I didn’t want to neglect either Noah or Mio, so I was sure I wanted to make them a two-in-one, but completely ignoring all their secondary weapons was a tough call. Moreover, since they could easily join the battle as standalone characters, I hope the Fusion Arts were enough to justify making them a duo. Though, I wasn’t prepared for how much work it’d take to finish this. Regardless, it’s finally done, and thank the Architect for that. With all that being said, if you’ve somehow reached the end of this and never tried Xenoblade, I couldn’t recommend it enough! Monolith Soft are among Nintendo’s most ambitious and groundbreaking studios, and I can’t wait to see where they go from here.
 |