September 23, 2014|
I originally posted this on SmashBoards. Please go there to follow the conversation.
Smash 4 3DS/4 Wii U introduces equipment, custom moves and (only used in Smash run) items. There has already been a lot of talk about custom moves, and all have been revealed/ translated already. Thank you to all the users who have posted in depth analysis of custom move sets. Custom moves are tournament viable, but I’m not sure if equipment is, due to the extremely random nature of it. This is my feeling after playing playing Single Player modes for over 32 hours. Let me explain:

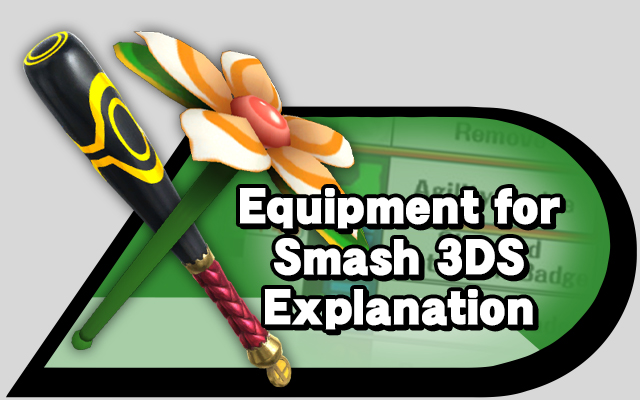
What is Equipment:
Each character can equip up to 3 pieces of equipment. Equipment that increases Attack (But lowers Defense), equipment that increases Defense (but lowers Speed) and finally equipment that increases Speed (but lowers Attack). In Smash Run, certain pieces of equipment can effect the amount of items you can hold. However, in regular Classic Mode/ Versus there is no drawback on equipping three powerful equipment.
Some equipment are character specific. For example, Olimar can equip Pikmin related equipment but Mario cannot. Bowser and Bowser Jr. can equip items that have spiky shells, etc.
There is also a tier of equipment. For example, there are “familiar boots” which are almost always less effective than “stylish boots”.
Effects:
Each item can have their own effect. More research needs to be done if some are equipment tiered specific. Some of the effects include, auto-healing, increasing/decreasing speed and jump, holding an item (which doesn’t appear on Omega/Master Core Battles but appears in the Credits Roll), increasing Smash start up time, etc. Currently, I have 81 different effects. I believe there are still more.

Drop System:
Each time you collect a custom pieces, you have a chance to receive a piece of equipment, custom move, hat or costume. You collect these custom pieces through local multiplayer matches, and almost all the single player modes (The Multi-Man Melee being an exception). For Classic Mode, the amount you receive is dependent on the “slot” you pick at the start of each match. On higher difficulties, the amount received is increased. As of right now, I cannot see a difference between the quality of items received on the difficulties, but more testing is to be done (More on this below). In Smash Run, you can collect the custom pieces through chests and by random enemy drops. You can get up to 10 per “run” (Pun intended). Each run lasts about 6-7 minutes, so that means Smash Run is currently the most efficient way to collect drops, as long as RNG (Random Number Generator) is on your side. Typically in Trophy Rush you can get up to 3, depending on skill and again RNG.
Stats:
As far as I can tell, the equipment stats are almost completely random. There are some noticeable difference in tiers, but within the tier it seems that the numbers are decided among drop. After 600+ pieces of equipment, I have yet to find a piece of equipment that has the same exact stats as the other.
Here’s a list of “Stylish boots” I have found: All + are towards speed, and the the – is towards Attack.The number after the equal sign is the difference between the two. Please note that items with effects, will sometimes have a negative impact on stats.
+26 -23 = + 3
+31 -16 = +15
+35 -17 = +18
+36 -21 = +15
+36 -24 =+12
+38 -19= +19
+39 -26 =+13
+40 -26=+14
+42 -21 =+21
+42 -25 =+17
+42 -27 =+15
+42 -28=+14
+44 -23 =+21
+45 -29=+16
+46 -28 =+18
+46 -29=+17
+47 -31=+16
+48 -26 =+22
+48 -27=+21
+50 -32=+18
+50 -33=+17
+51 -28=+23
+51 -35=+16
+52 -34=+18
+54 -29=+25
+54 -36=+18
+55 -30=+25
Here is some miscellaneous information about the equipment above:
Difference between +/- in ascending order:
3,12,13,14,14,15,15,15,16,16,16,17,17,17,18,18,18,18,18,19,21,21,21,22,23,25,25
Mean Difference: 17.2963
Median Difference: 17
Mode Difference : 18
The program probably has a set requirement for each type of equipment differences, and then decides to go X amount above or below.
No End for Equipment?
In the Challenge Window, there is no challenge for completing all the equipment. This makes me believe that there is no definite list of equipment to collect. It seems that I can continue to farm equipment until my eyes bleed and fall out.
Why They Might Not Be Tournament Viable:
Since you can continually collect equipment, and is totally dependent on RNG, players who farm equipment in Single Player may have an unfair advantage to those who don’t. Looking at the list of “Stylish boots”, some have the same increase but different decreases.
What do you guys think? Let me know if you want particular information about equipment/ have idea for experiments.
EDIT: I found a list of Equipment in the ROM Dump.
English description of equipment effects. 93 total if I’m not mistaken.
- Increased run speed
- Decreased run speed
- Increased lateral air movement
- Decreased lateral air movement
- Improved jump
- Weakened jump
- Skating traction
- Improved ground jumps
- Weakened ground jumps
- Improved double jump
- Weakened double jump
- Floaty jumps
- Heavy jumps
- Increased walk speed
- Decreased walk speed
- Increased edge-grab duration
- Decreased edge-grab duration
- Easier edge grabs
- Harder edge grabs
- Improved braking ability
- Easy perfect shield
- No perfect shield
- Improved shield regeneration
- Weakened shield regeneration
- Improved air defense
- Weakened air defense
- Improved dodge ability
- Weakened dodge ability
- Reduced landing impact
- Increased landing impact
- Quick smash attacks
- Hyper smash attacks
- Improved air attacks
- Weakened air attacks
- Improved meteor effect
- Improved attack in a crisis
- Improved defense in a crisis
- Improved speed in a crisis
- Powered up in a crisis
- Invincibility in a crisis
- Improved attack at 0 damage
- Improved speed at 0 damage
- Improved attack/speed at 0%
- Improved trade-off attack
- Improved trade-off defense
- Improved trade-off speed
- Improved trade-off ability
- Improved launch ability
- Damage-stealing capability
- No-flinch charged smashes
- Critical-hit capability
- Prone damage dealer
- First-strike advantage
- Countdown bonus
- Crash run
- Explosive perfect shield
- Health-restoring shield
- Improved escapability
- Mirror shield
- Stronger item throws
- Weakened item throws
- Battering item boost
- Throwing item boost
- Projectile item boost
- Quicker bat swing
- Star Rod equipped
- Lip’s Stick equipped
- Super Scope equipped
- Ray Gun equipped
- Fire Flower equipped
- Beam Sword equipped
- Home-Run Bat equipped
- Bob-omb equipped
- Mr. Saturn equipped
- Increased healing from food
- Decreased healing from food
- Heal while crouching
- Improved attack after eating
- Improved speed after eating
- Improved defense after eating
- Power up after eating
- KOs heal damage
- Invincibility after eating
- Auto-heal capability
- Smash Ball gravitation
- Respawn Final Smash
- Smash Ball retention
- Powered up Final Smash
- Healing Final Smash
- Chance of double Final Smash
- Chance of lucky Sudden Death
- Extended respawn invincibility
- No respawn invincibility
Additional Information:
- 1.3x running speed.
- 0.8x running speed.
- 1.25x lateral air movement speed.
- 0.8x lateral air movement speed.
- 1.2x jump height.
- 0.8x jump height.
- 1.5x movement speed on land, but watch that you don’t slip!
- 1.3x jump height from the ground.
- 0.7x jump height from the ground.
- 1.3x midair jump height.
- 0.7x midair jump height.
- 0.6x speed when falling.
- 1.4x speed when falling.
- 1.3x walking speed.
- 0.8x walking speed.
- Hang on to the edges of stages for twice as long.
- Hang on to the edges of stages for half as long.
- Increased range for grabbing stage edges.
- Decreased range for grabbing stage edges.
- Stop on a dime even when dashing.
- More easily nullify attacks when blocking at the last second.
- Only get a normal shield no matter how good your timing is.
- Recharge your shield more quickly.
- Recharge your shield more slowly.
- 0.75x damage received when in midair.
- 1.2x damage received when in midair.
- Gives a little extra time to dodge an enemy attack.
- Gives a bit less time to dodge an enemy attack.
- Start moving again more quickly after landing.
- After landing, take more time to start moving again.
- Charge smash attacks faster when holding the attack button.
- Charge smash attacks for longer to get 1.3x power.
- 1.15x attack power while airborne.
- 0.75x attack power while airborne.
- 1.5x power when using moves that launch opponents downward.
- 1.7x attack power for 20 seconds when damage reaches 100%.
- Take 0.33x damage for 20 seconds when damage reaches 100%.
- 1.55x speed for 20 seconds when damage reaches 100%.
- Slowly increase attack, defense, and speed for 20 seconds when damage reaches 100%.
- Gain 7 seconds of invincibility when your damage reaches 100%.
- 1.5x attack power while damage is at 0%.
- 1.32x speed while damage is at 0%.
- Attack and speed gradually increase while damage is at 0%.
- 1.15x attack power from the start of the match…as well as 30% damage.
- Start the match with 30% damage, but take only 0.8x damage from attacks.
- 1.3x speed from the start of the match…as well as 30% damage.
- Start with 60% damage but slowly gain attack, defense, and speed.
- 1.3x attack power when launching enemies upward.
- When directly striking an opponent, may recover health relative to damage inflicted.
- You cannot be launched by standard attacks when charging a smash attack.
- Attacks get a 20% chance of dealing extra damage.
- 1.4x damage when hitting a prone opponent.
- If you land the first strike of the battle, you will be invincible for 10 seconds.
- Greatly improved launch power for the last five seconds of a battle.
- Do damage to an opponent if you crash into them while dashing.
- Shield against an attack with perfect timing to create an explosion.
- Recover health when shielding relative to the power of received attacks.
- Escape more easily from being grabbed, stunned, etc.
- When shielding, reflect some damage back at your attackers.
- 1.5x attack power to thrown items.
- 0.7x attack power to thrown items.
- 1.5x attack power to battering items. Item-throwing range increased.
- 1.5x attack power and ammo for items that fire projectiles.
- Faster smash attacks when using the Home-Run Bat.
- Start battles with a Star Rod. Wave it to fire star-shaped projectiles.
- Start battles with a Lip’s Stick. Hit an opponent to plant a damaging flower.
- Start battles with a Super Scope. Attack with charge shots or rapid fire!
- Start battles with a Ray Gun. Blast your foes with lasers!
- Start battles with a Fire Flower. Roast your enemies!
- Start battles with a Beam Sword. The stronger the attack, the longer the reach.
- Start battles with a Home-Run Bat. Use smash attacks and aim for the stands!
- Start battles with a Bob-omb. Just don’t hold on to it for too long…
- Start matches with Mr. Saturn. He does huge damage to fighters’ shields.
- 1.5x damage healed when eating food.
- 0.7x damage healed when eating food.
- Slowly heal damage while crouching.
- 1.4x attack power for 15 seconds after eating food.
- 1.38x speed for 15 seconds after eating food.
- 0.5x damage received for 15 seconds after eating food.
- Attack, defense, and speed rise gradually for 15 seconds after eating food.
- Recover damage when you KO an enemy.
- Become invincible for 5 seconds after eating food.
- Heal damage gradually over time.
- Automatically draw Smash Balls to you.
- After a KO, return to battle ready to use your Final Smash.
- When glowing with your Final Smash, resist losing it when attacked.
- Attack, defense, and speed rise gradually while you have the Final Smash glow.
- Heal damage gradually while you have the Final Smash glow.
- After using a Final Smash, you have a 20% chance of being able to use it again.
- Get a 50% chance of going into Sudden Death with only 100% damage.
- Invincibility will last three times as long after being KO’d.
- Get no invincibility after being KO’d.
Item Icon Types:
- Remove
- Brawn Badge
- Gloves
- Banana
- Sword
- Arm Cannon
- Egg
- Lollipop
- Blaster
- X Attack
- Bat
- Toad
- Fake Nails
- Magic Stone
- Needles
- Hammer
- Torch
- Zapper
- Sacred Treasures
- Drill
- Beam Whip
- Pikmin
- Staff
- Protein
- Boxing Gloves
- Lloid
- Tome
- Protection Badge
- Overalls
- Tie
- Shield
- Suit
- Saddle
- Hat
- Jacket
- X Defense
- Cape
- Dress
- Shell
- Coat
- Raiment
- Watch Battery
- Mask
- Space Suit
- Block
- Ring
- Clothes
- Collar
- Helmet
- Agility Badge
- Shoes
- Boots
- X Speed
- Booster
- Pumps
- Shin Guards
- Sandals
- Dash Mushroom
- Rocketbarrel Pack
- Microchip
- Feather
- Turbo Boost
And finally, naming types types:
- Rare
- Super
- Max-Power
- High-Power
- Power
- Exquisite
- High-Quality
- Ordinary
- Legendary
- Silver
- Steel
- Prototype
- Deluxe
- Standard
- Extra-Large
- Large
- Medium
- Decadent
- Delicious
- Yummy
- Sixfold
- Threefold
- Legendary
- Top-Notch
- Decent
- Fearless
- Brave
- Dedicated
- Gold
- Bronze
- Mysterious
- Mystical
- Enchanted
- Iron
- 100-ton
- 1-ton
- 100 lb.
- Blazing
- Burning
- Smoldering
- Godly
- Angelic
- Heroic
- Hyper
- Light
- Holy
- Purifying
- Three-Star
- Two-Star
- One-Star
- Heavyweight
- Middleweight
- Lightweight
- Mega
- Good Ol’
- Mini
- Sage’s
- Expert’s
- Apprentice’s
- Vintage
- Trendy
- Designer
- Expensive
- Discount
- Hero’s
- Pretty Sweet
- Average Joe’s
- Master’s
- Veteran’s
- Rookie’s
- King’s
- Knight’s
- Squire’s
- Diamond
- Turtle
- Ultra-Performance
- High-Performance
- Vengeful
- Heroic
- Enigmatic
- Expensive
- Stylish
- Well-Worn
- Ultra-Lightweight
- Lightweight
- Speedy
- Swift
- Nimble
- Turbo
- Double
- Light-Speed
- Mach-Speed
- High-Speed
- Shimmering
- Shiny
- First-Class
- Deluxe
- Sprinter
- Stroller
- Glider
- Antiglide
- Leaper
- Antileap
- Speed Skater
- Hi-Jump
- Lo-Jump
- Double-Jump Boost
- Double-Jump Drag
- Thistle Jump
- Anchor Jump
- Speed Walker
- Meanderer
- Lingering Edge
- Hasty Edge
- Gluey Edge
- Tough Edge
- Hard Braker
- Perfect-Shield Helper
- Imperfect Shield
- Shield Regenerator
- Shield Degenerator
- Air Defender
- Air Piñata
- Nimble Dodger
- Dodgy Dodger
- Smooth Lander
- Crash Lander
- Quick Smasher
- Hyper Smasher
- Air Attacker
- Air Pushover
- Meteor Master
- Desperate Attacker
- Desperate Defender
- Desperate Speedster
- Desperate Specialist
- Desperate Immortal
- Unharmed Attacker
- Unharmed Speedster
- Unharmed Speed Demon
- Trade-off Attacker
- Trade-off Defender
- Trade-off Speedster
- All-around Trade-off
- Moon Launcher
- Vampire
- No-Flinch Smasher
- Critical Hitter
- Insult to Injury
- First Striker
- Countdown
- Speed Crasher
- Shield Exploder
- Shield Healer
- Shield Reflector
- Escape Artist
- Item Hurler
- Item Lobber
- Item Hitter
- Item Pitcher
- Item Shooter
- Quick Batter
- Star Rod
- Lip’s Stick
- Super Scope
- Ray Gun
- Fire Flower
- Beam Sword
- Home-Run Bat
- Bob-omb
- Mr. Saturn
- Food Lover
- Picky Eater
- Crouch Healer
- Caloric Attacker
- Caloric Speedster
- Caloric Defender
- Caloric Powerhouse
- KO Healer
- Caloric Immortal
- Auto-Healer
- Smash Ball Attractor
- Pity Final Smasher
- Smash Ball Clinger
- Super Final Smasher
- Final Smash Healer
- Double Final Smasher
- Sudden Death Gambler
- Safe Respawner
- Risky Respawner
There’s also no challenge complete text for equipment, so it’s confirmed that there is no limit to the amount of equipment you can have.
Latest posts by PushDustIn (see all)
Tagged with: 3DS, game, gaming, Japan, Japanese, Masahiro Sakurai, Nintendo, Nintendo 64, Nintendo of America, Nintendo of Japan, Sakurai, Smash, Smash Brothers, Super Smash Brothers, translation